In this post I would like to share some of the keywords that I have used and found influence the composition which comprises of the Camera Position (distance of camera from subject) and the Camera Angle (where the camera is place relative to the subject). Although this post is solely focusing on Stable Diffusion XL (SDXL) the same can be applied to Stable Diffusion (SD), Midjourney, Adobe Firefly, or Leonardo.ai
Firstly to source the keywords we search the web to find a good resource and the site I found most useful was https://www.studiobinder.com/blog/ultimate-guide-to-camera-shots/ and various others I cannot recall as I was collecting keywords around framing and angle.
Keywords – Framing and Angle
Now that we have collected the keywords, let’s explore the keywords and how they will affect the composition.
Camera Framing/Distance – here we start very much zoomed in close to the subject and then slowly pull back to reveal the full head-to-toe shot of the subject.
- extreme close-up
- close-up
- medium close-up
- medium shot
- long shot
- establishing shot
- medium full shot
- full shot
- upper body shot
- full body shot
Camera Angles/Position
- front view
- bilaterally symmetrical
- side view
- back view
- from above
- from below
- from behind
- wide angle view
- fisheyes view
- macro view
- overhead shot
- top down
- bird’s eye view
- high angle
- slightly above
- straight on
- hero view
- low view
- selfie
For the purpose of the demonstration we will use the same prompt and use the XYZ Plot option in Stable Diffusion WebUI to plot both the camera framing and angle. I batch up the prompt and leave my PC for 30-40mins while it churns out the images.
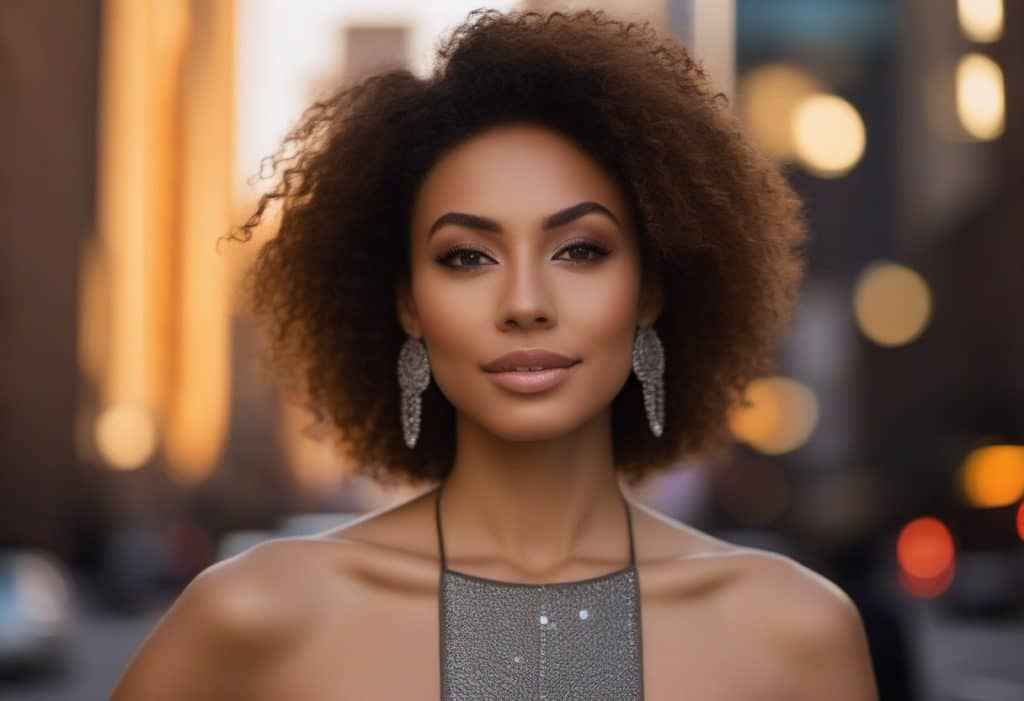
1st row prompt: <framing>, BREAK a gorgeous woman with short dark hair, new york city, <framing>, sunset
prompt: <framing>, <angle>, BREAK a gorgeous woman with short dark hair, new york city, <framing>, <angle>, sunset
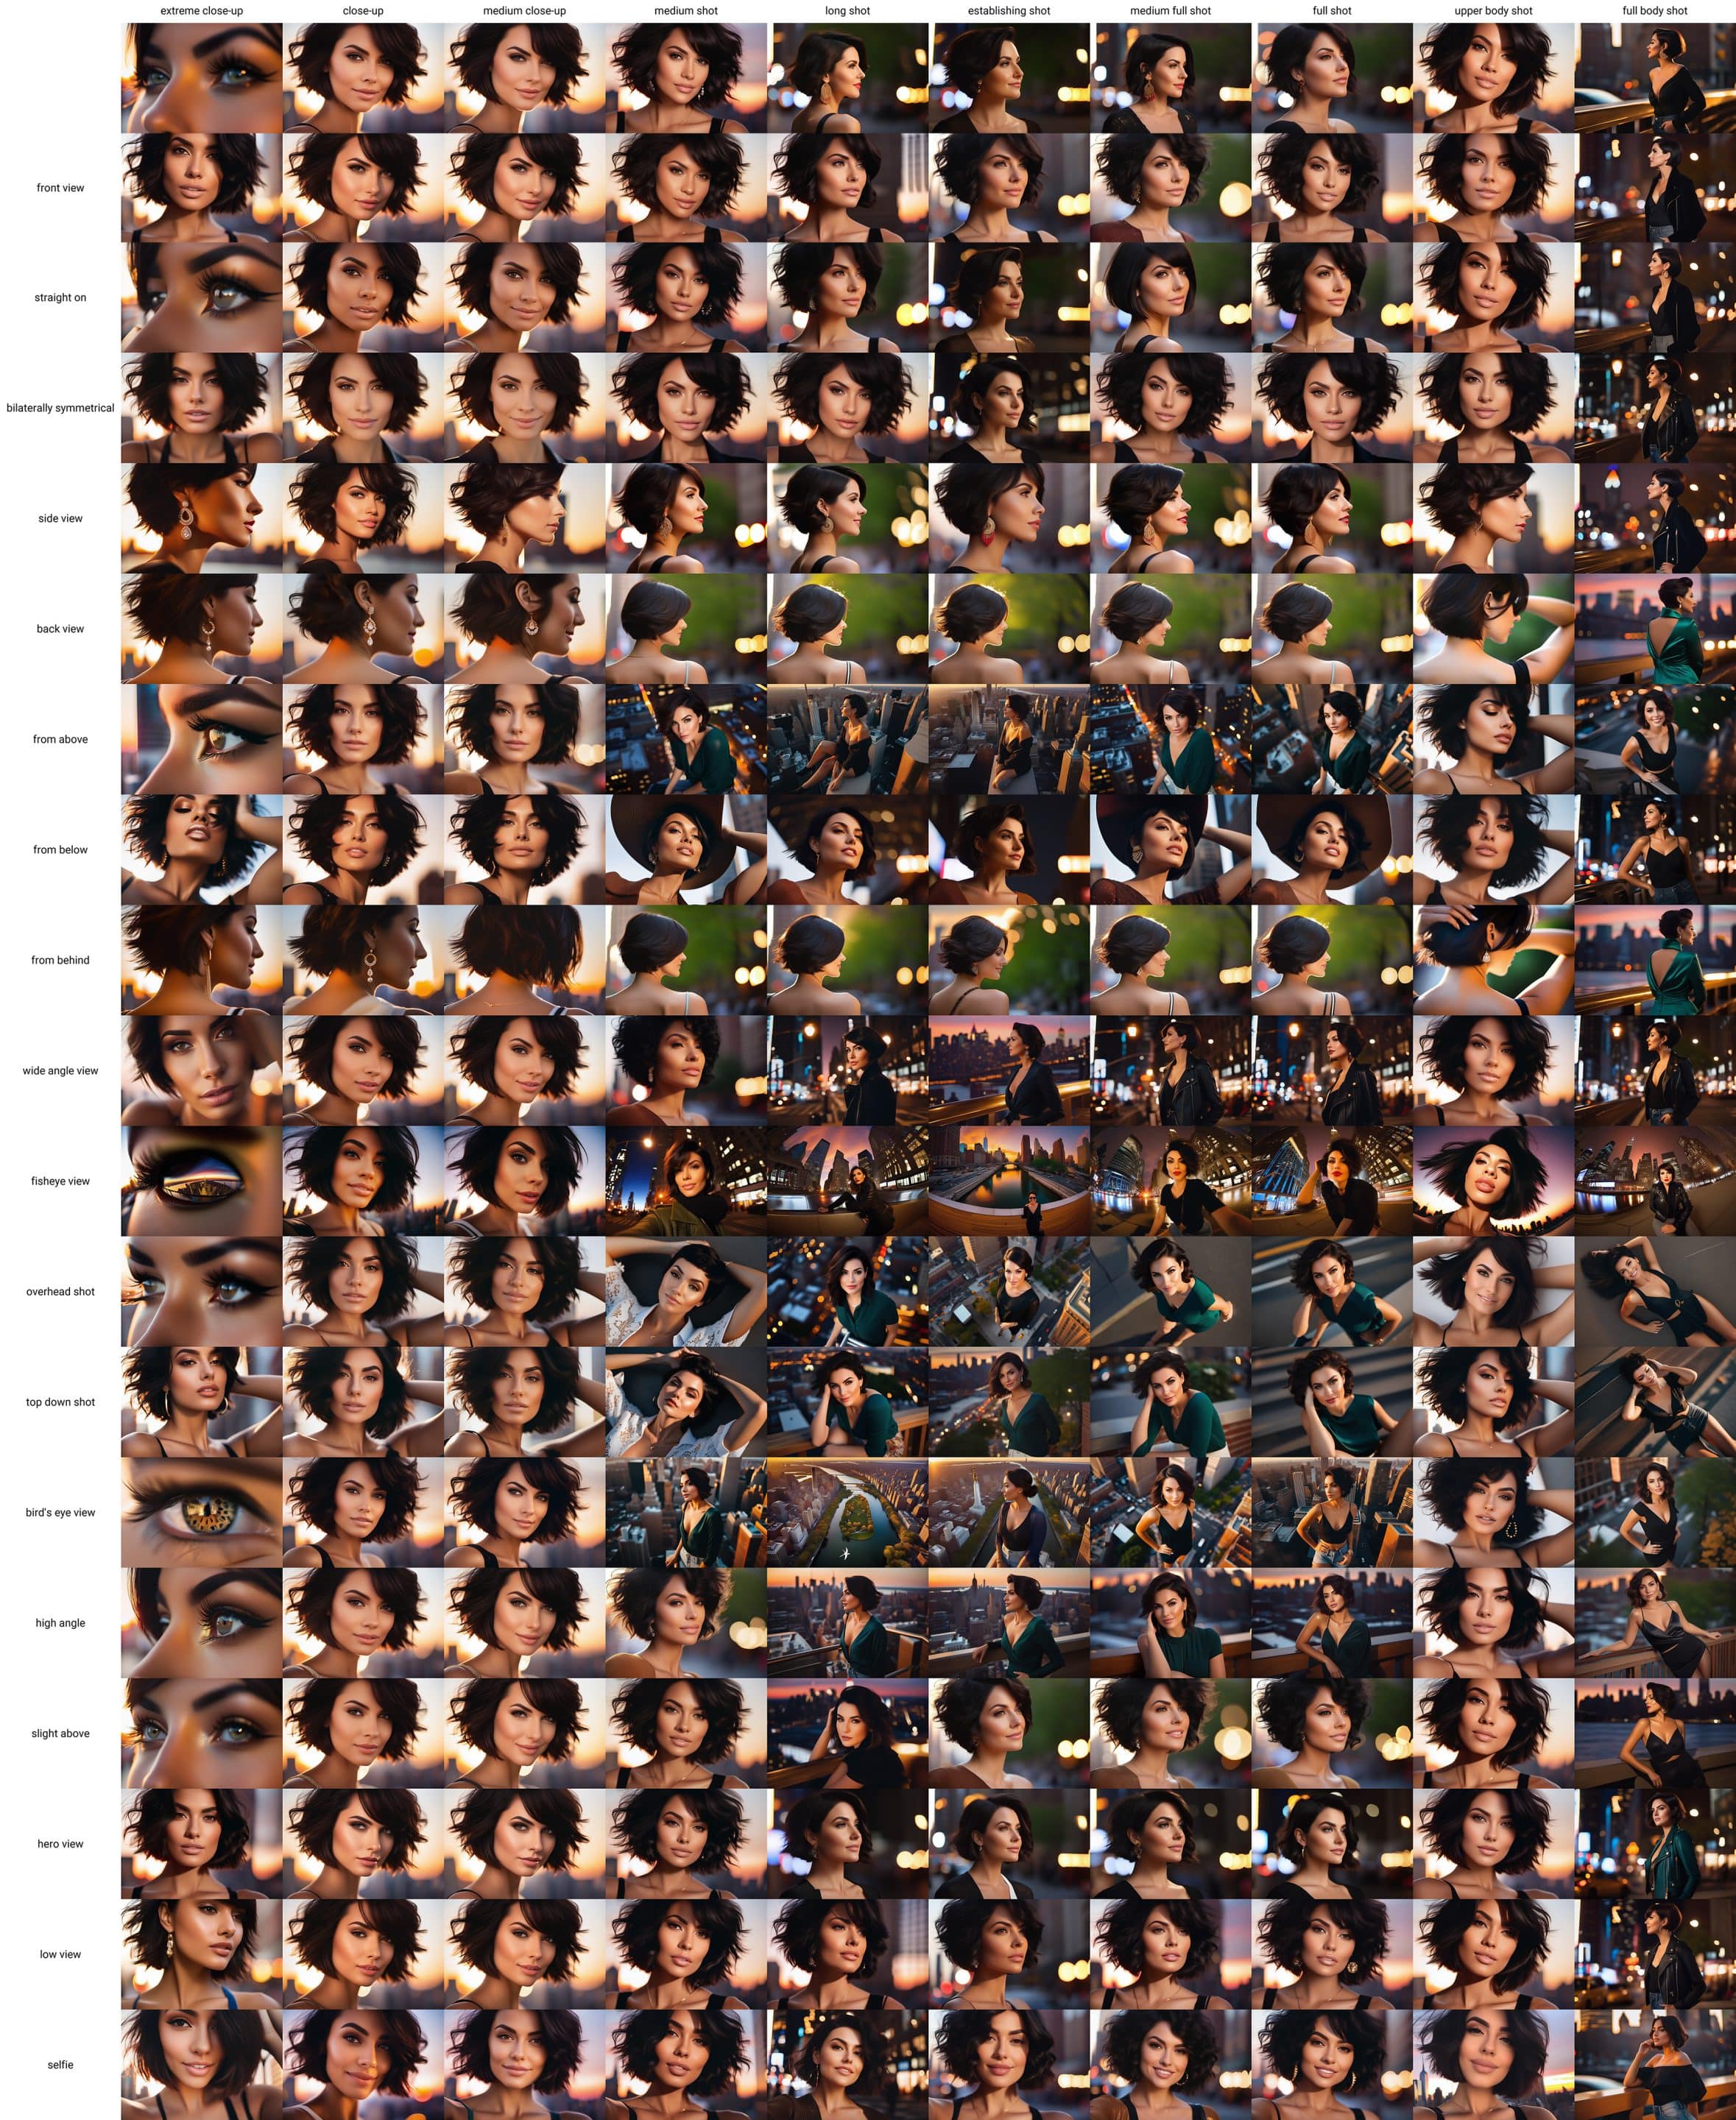
At the end of all the processing Automatic1111 produces the required GRID for comparison and review. I save the image and down-scale it to a workable size. Next step is to carefully analyse these image to start making some assessments. The first row is simply focusing on the framing or distance of the camera from the subject.
Framing Review
This row is key and will allow us to already discard so many image which we can exclude for the rest of the batch.
- extreme close-up: it works well really zooms into the eyes of the subject. So this is a keeper.
- close-up and medium close-up: these pretty much produce the same result and you can verify this by reviewing the rest of the images in these columns. So I will keep close-up as the keyword and discard medium close-up.
- medium shot: you start to see the camera zoom out a bit to reveal the shoulders and you can see consistently as you go down this column. However, as per the different composition guides from real camera its not quite the same.
- long shot and establishing shot: both are similar definitions as they both show the subject in their environment to set the scene of where the subject is. As you scroll down this column there are some difference when combined with the camera angle, however I feel establishing shot would be more distinct in a prompt and long shot when combined with camera angle. It also steps back a bit more to reveal more of the subject.
- medium full shot and full shot: both set of keywords are resulting in the same kind of framing. Scrolling down the image column the produce very similar results. They are not aligned well with the camera framing of real word but still produce a wider shot. These are very similar to medium shot so we can discard these.
- upper body shot: this does not produce any unique results and is similar to close-up keywords.
- full body shot: this should frame the subject from head to toe and certainly shows more of the subject then all the other keywords.
So in conclusion we will stick with following keywords for our prompts: extreme close-up, close-up, medium shot, establishing shot and full body shot.
Camera Angle Review
- front on and straight on: these produces pretty much the same results where the subject is mostly looking at the camera. However as we change the framing the subject starts to look away. We can use either of the keywords but I like straight on so I will use these for further investigation.
- bilaterally symmetrical: although this is not a camera angle but as I discovered this during my research, the subject is centered and symmetrically framed. It does change as we zoom out in our framing.
- side view: side profile view of the subject which is correctly represented in the results.
- back view and from behind: forces the camera behind the subject and therefore we should be seeing the back of the head. Both produce very similar results.
- from above: It works in most cases as we zoom out and move far back from the subject. Camera is positioned above the eye level of the subject.
- from below: it works quite well as we move across the different framing of the subject. Camera is positioned below the eye level of the subject.
- wide angle view: this kind of overlaps as angle of view and framing. Obviously we can see that that when paired with close-up etc. it produces conflicting results. But as we zoom out we get a wider frame and angle on the subject.
- fisheye view: fisheye lens and angle can add a creative flare to your images and as you can see other than the first image, others represent the fisheye effect in the results.
- overhead shot: up close framing doesn’t seem to consider this angle but as your framing moves out the results start to be correctly represented.
- top down shot: seems to work as the camera moves out but not very well when you are up close.
- bird’s eye view: this produces similar result to the top down shot and there is not much difference. It does not go as high as the bird but I wonder if having more specific terms will achieve better result.
- high angle: this does not produce the expected result in any kind of framing.
- slight above: only seems to produce the expected result in one image, the rest pretty much at eye level.
- hero view: seems to produce the correct result even when up close vs wide angle. It is producing images that places a camera so its looking up at the subject. Producing that hero shot!!
- low view: very much similar to the hero view.
- selfie: it also produces the desired result as the camera is going to be close so positions that move the camera away don’t produce the coherent result. Most of the camera placements have little to no affect eg. Full body shot is not possible with a selfie.
Now let’s summarise which angles appear to work best from the series. These are straight on, bilaterally symmetrical, side view, back view (or from behind), from above, from below, wide angle view, fisheye view, overhead shot, top down shot, slight above, hero view, slight above, and selfie.
Now to emphasise the, you can always increase the weight of these keywords in your prompt, this will give more importance to your resulting image. eg. (hero view:1.3)
Combining the framing and angle
To create well composed images you need to combine the frame/position of the camera with the right pairing in terms of the camera angle. This also includes the aspect ratio of the image; landscape or portrait.
All the images are composed using SDXL 1.0 at 1216x832px size (landscape) and 832x1216px size (portrait). The CFG scale was set to 8.5 and 25 steps were used with Random Seed.
Let’s explore a few of these with sample image.
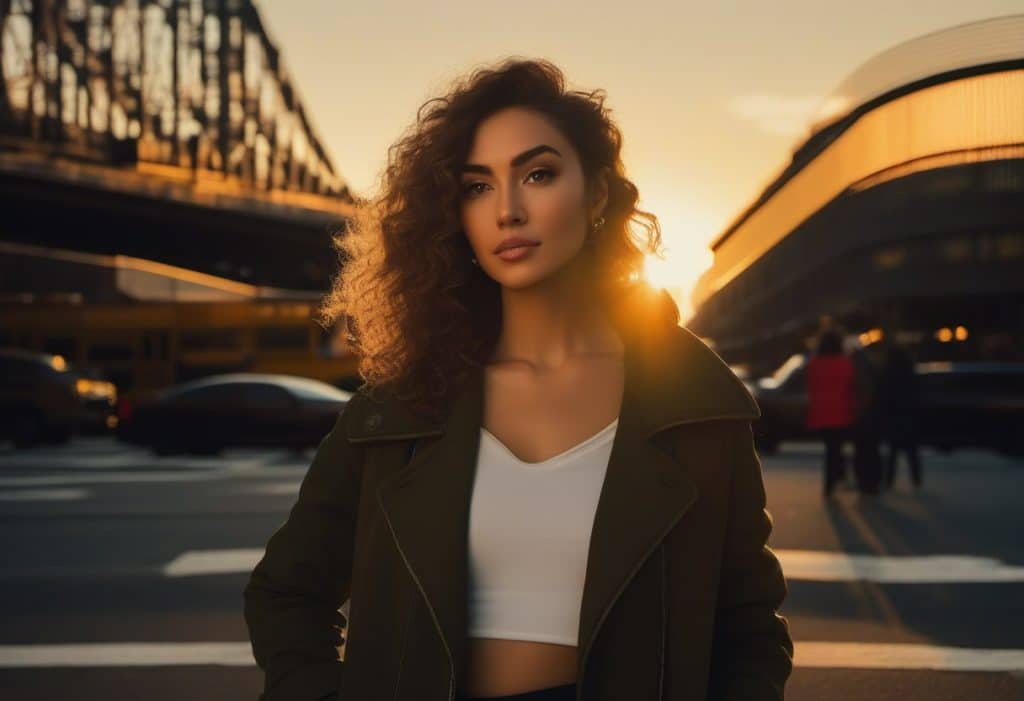
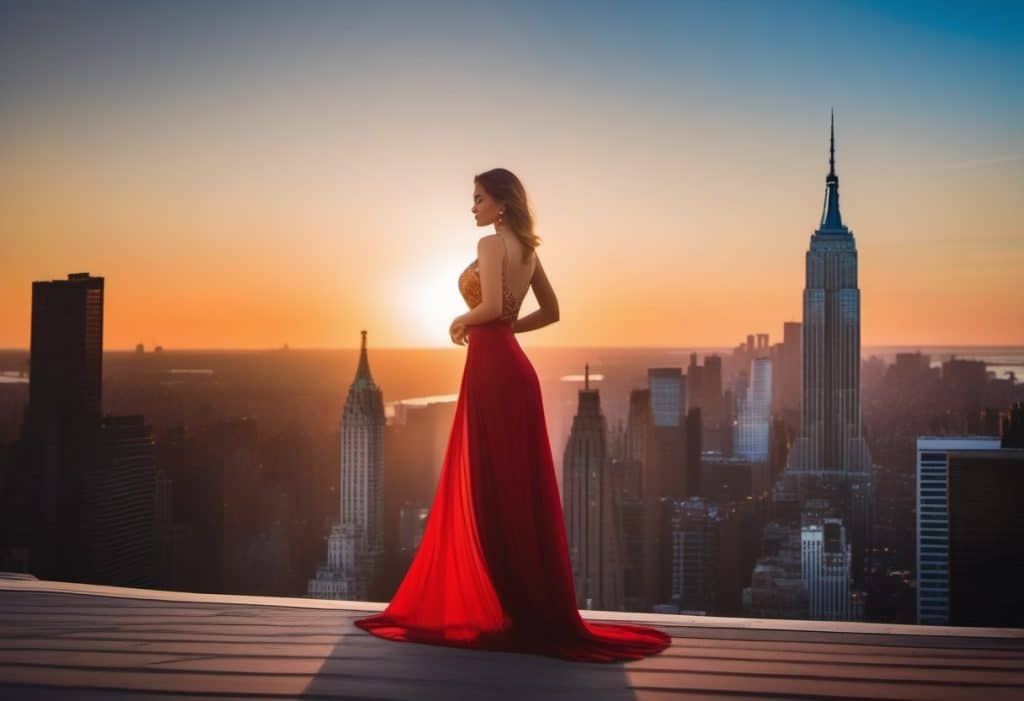


Switching up images in portrait work well as it gives more room to frame the subject correctly and position the camera at the right angle.
What is the conclusion of all this, well there isn’t one. Certain keywords have a more profound affect on the image and how its framed and composed. The seed also has a key factor in the resulting image which I noticed when creating batches of images using the same prompt, there are some seeds where it will work well and you will get the desired result but others which will not adhere to the prompt so well. So my suggestion is to keep trying, find the right seed numbers and then you can work on refining the image and upscaling etc.
If you'd like to support our site please consider buying us a Ko-fi, grab a product or subscribe. Need a faster GPU, get access to fastest GPUs for less than $1 per hour with RunPod.io
Thanks for your collection, I’m very grateful, looking forward to more good quality articles from you.
Thank you so much for your entire collection