
Midjourney has evolved at an exponential rate, with each of their AI models better than the last, the bar keeps getting raised with each iteration. As such with the evolution there are new options brought out that let you have more control over the resulting image.
Stylize Parameter
The stylize parameter which is defined using –stylize or –s parameter in the prompt let’s you control how artistically strong the image is towards the prompt supplied to Midjourney. It was introduced when version 4 model was released by Midjourney. It supports now niji 5, v5, v5.1 and current v5.2 model as well.
By default the –stylize of 100 is applied to each image if you don’t supply the value explicitly in your prompt. You can use value from 0-1000
Experiment with Stylize Parameter
Now that we understand how this parameter is used and what it does let’s experiment with it. We’ll run the same prompt: mysterious extraterrestrial world, inspired by Dan northup, highly detailed,ultrarealistic, high definition, detailed, best quality –seed 1234567890 –ar 3:2 –s <value>
In this case, we lock the seed to value 1234567890 and aspect ratio of 3×2, while we vary the –stylize value.
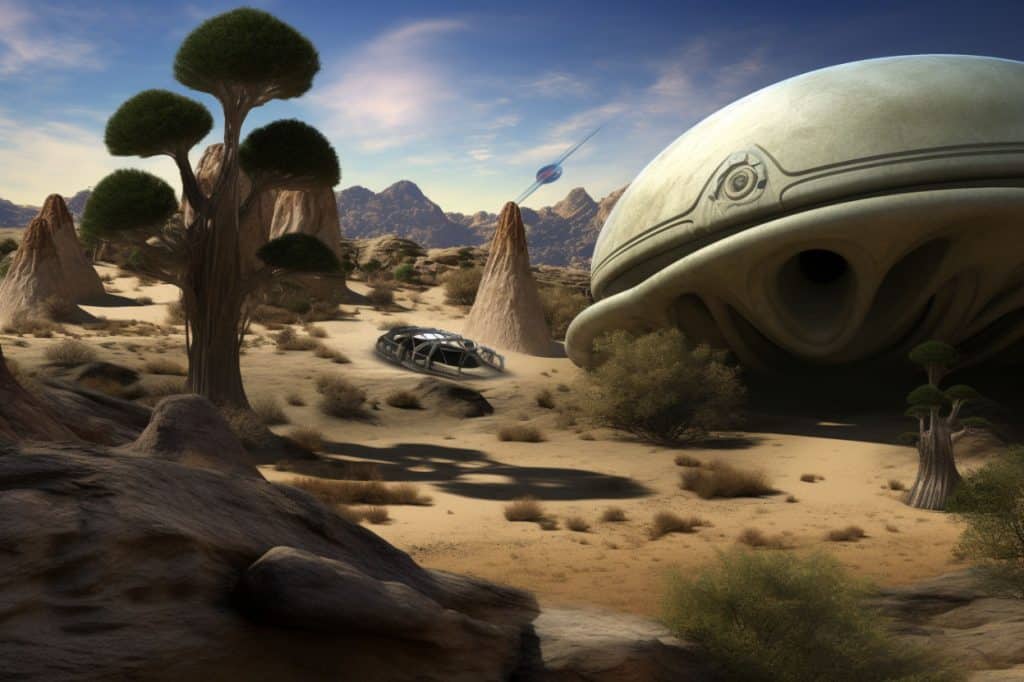
–stylize 0
In the first case we force the value of 0 because otherwise it will use the value 100 which is the default setting in Midjourney. The result produced is nothing to boast about and looks quite ordinary.
–stylize 100
The default value is 100, so we can set the –s parameter or simply exclude it from the prompt the result should be the same. The image starts to look quite interesting and more elements are present as this value is increased.
–stylize 250
Now we increase the strength of this value which should lean the resulting image towards more artistic style.

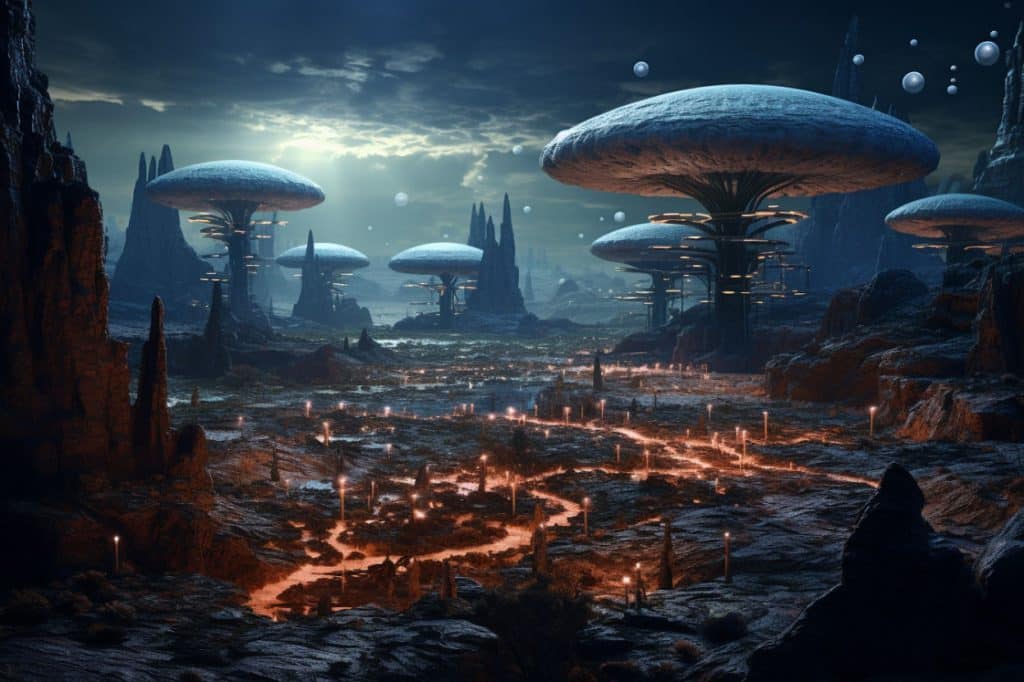
–stylize 500
We reach the midway point here with this value as the maximum is 1000 and therefore we can see how it influences the image further. You have a lot more details starting to appear in the image as you reach the value of 500. There are a lot more mushroom like elements appearing, a distant bridge, body of water and towering rocky mountains in the distant.
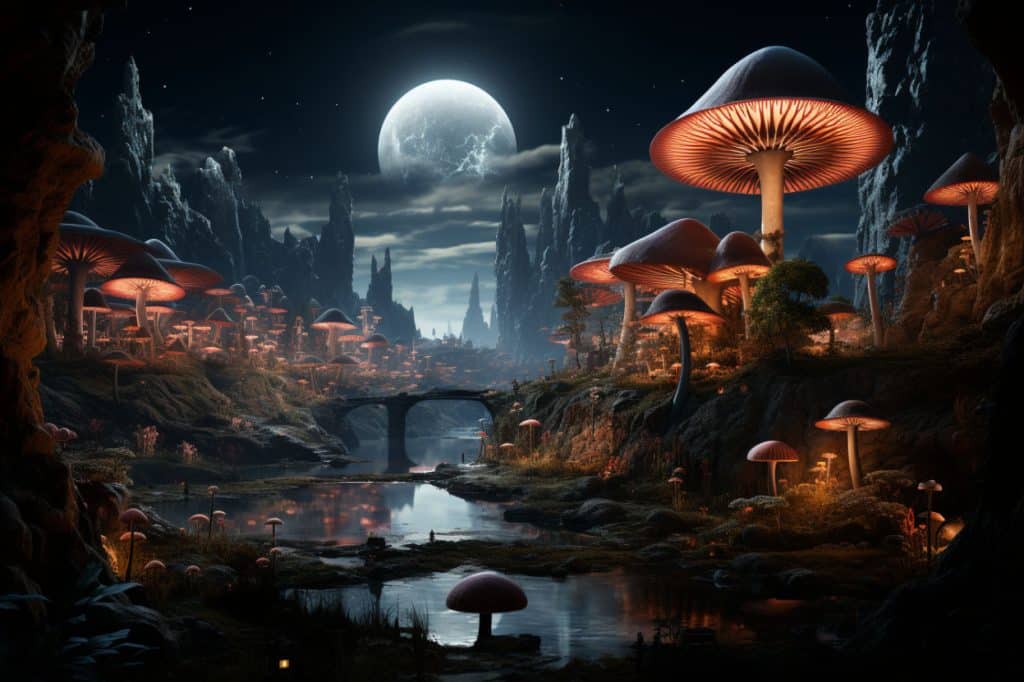
–s 750
Cranking the value up to 750, the differences between the previous and the current are not a whole lot. The bridge has disappeared, and some of the details in the mushrooms looks a bit more enhanced. That’s all!
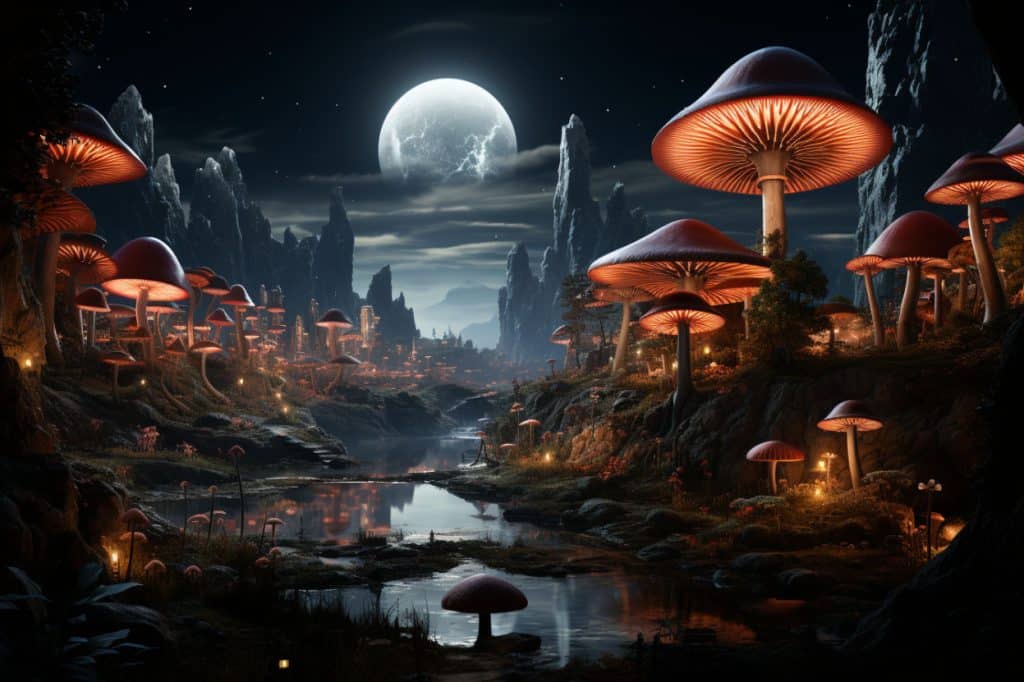
–s 1000
Again not seeing huge difference between 750 and 1000. Looks like a lot more of the mushroom elements are starting to take over in the image. Details are perhaps slightly more enhanced but does that really matter.

I posted a video clip on X (Twitter) which transitions from one image to another, this helps see the differences frame by frame. Have a look at this if you are curious.
Midjourney's Stylize parameter which is defined using –stylize or –s, it influences the artistic reach of the model in line with the prompt.
— Harmeet Gabha 🇦🇺 – MINTING "Domina Eleganti" (@HarmeetGabha) August 15, 2023
The higher the value the higher the artistic result. However after certain point the changes are subtle.
Tech info below #midjourney pic.twitter.com/2kB7ZMWPGk
Conclusion
Stylize is a great way to enhance and enrich your resulting image from Midjourney but as you see after a certain point the value has very subtle impact on the image. In my case most of the time I am using this value in my prompt and varying from 100-400 and not exceeding that threshold. I find the results are satisfactory for me, however I am sure you would want to experiment more and find the suitable range that works for you.
Thanks for stopping by the blog post, if you like what we are doing here, give us a follow.
If you'd like to support our site please consider buying us a Ko-fi, grab a product or subscribe. Need a faster GPU, get access to fastest GPUs for less than $1 per hour with RunPod.io
Trackbacks/Pingbacks