IPAdapter has been around for a long time (in AI space time) but I have never really taken the time to explore it in anyway. At the moment I am travelling on vacation and therefore have time to explore new things when not out and about. However I don’t have my PC with me so I’m spending some time using RunPod.io GPUs. These are proving to be quite convenient
I used the pre-built ComfyUI template available on RunPod.io which installs all the necessary components and ComfyUI is ready to go. I will perhaps share my workflow in more details in coming days about RunPod.io.
Setup IPAdapter Plus
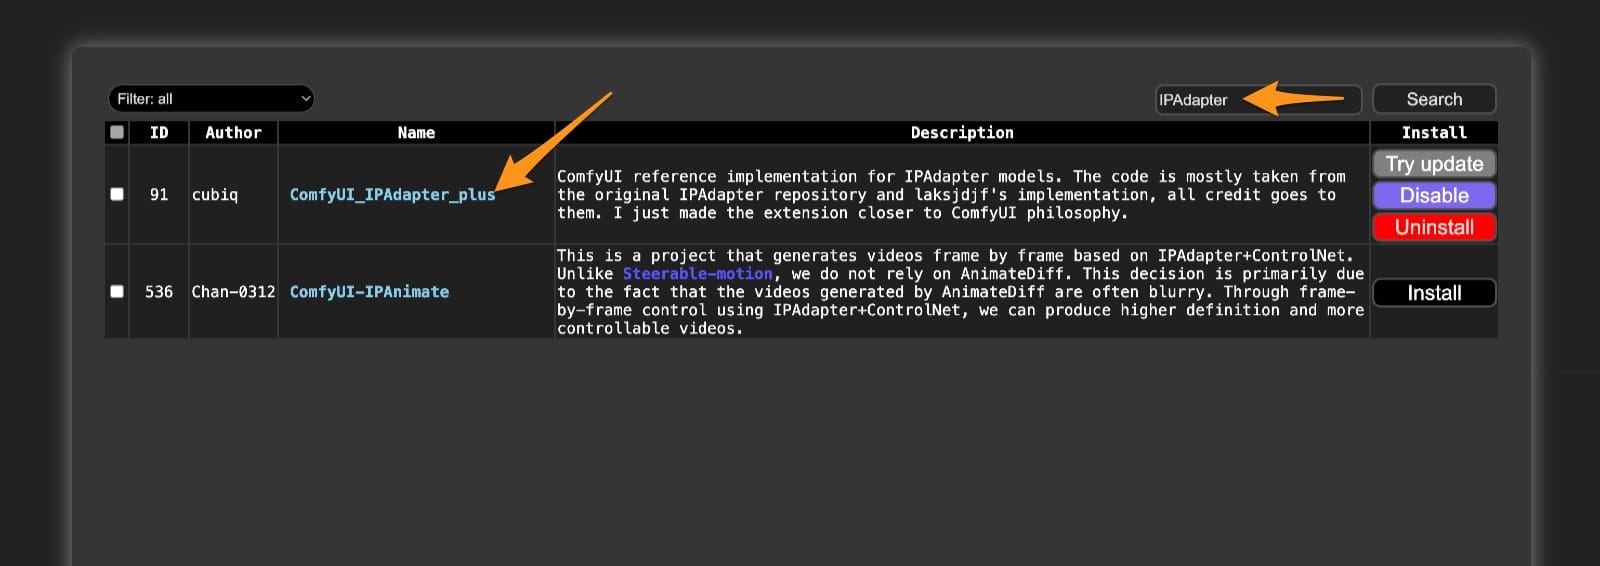
However here we are talking about ComfyUI IPAdapter Plus which you can install using ComfyUI Manager on your instance. You then need to download a bunch of models yes the list is long and specifically with ClipVision models you need to remember to rename them as instructed by the Author. Doesn’t matter if you are running locally or in the cloud the steps are the same.
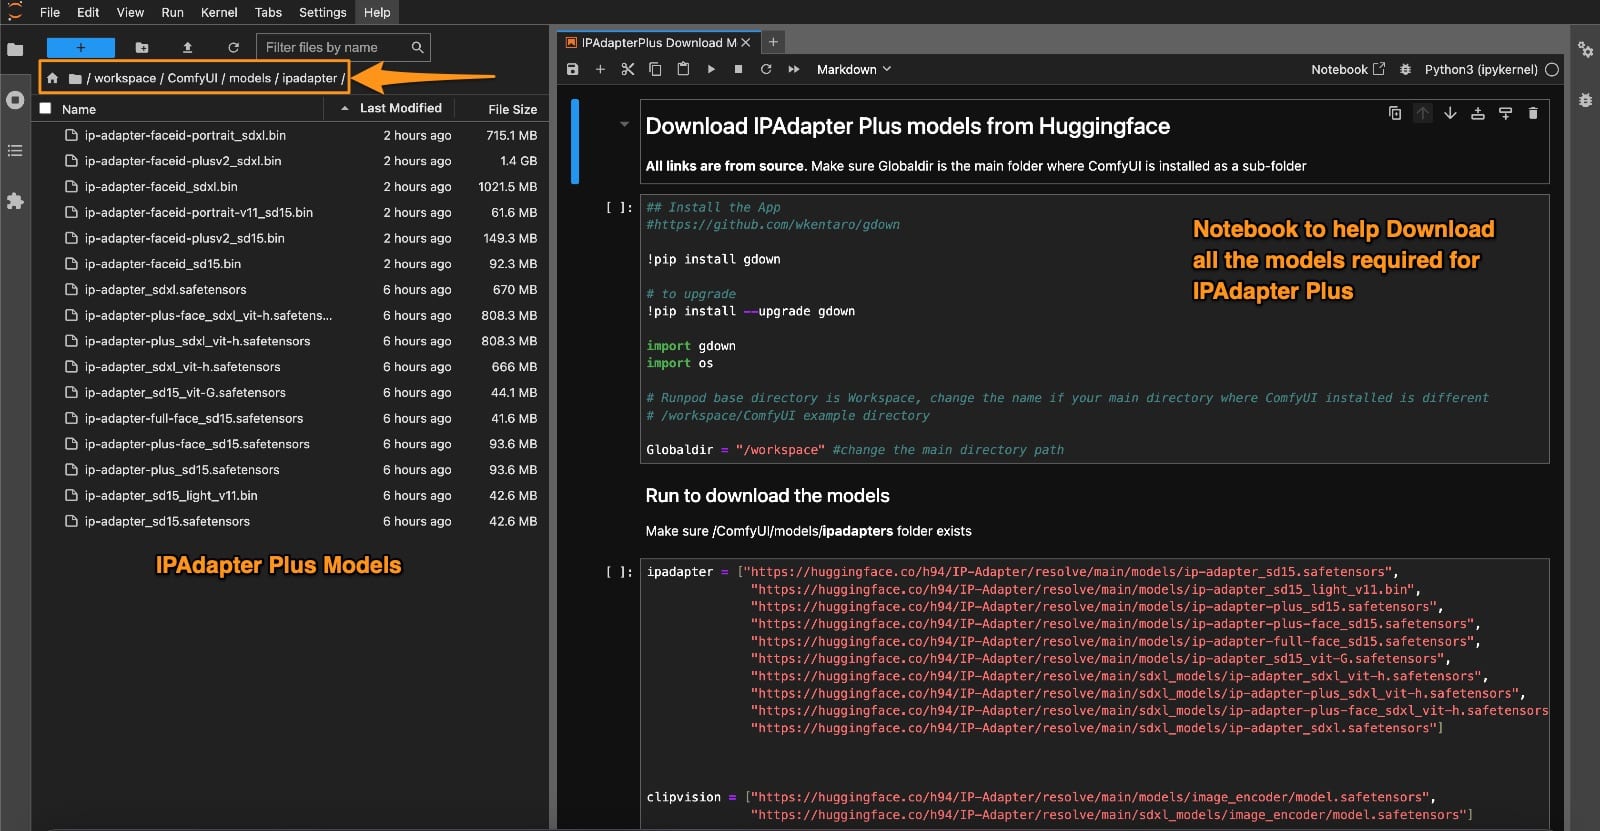
The first challenge is to download all the models, so I built a Jupyter Lab notebook (shown below) which you can simply upload via the file explorer and run up its cells. It will download and install all the models. You probably need to create ipadapter folder under ComfyUI\models as it seems the Custom Node does not create this folder, at least not in my instance.
You also need to install InsightFace if you want to use FACEID models. In this case if you are running on Windows then you should review this thread which covers how to make it work as you need specific build requirements.
However, I was on Linux based OS so its quite easy. Just run this command on your computer or venv. On the RunPod.io image there is no venv so it installs in the core.
pip install insightface onnxruntimeThis will compile and build based on the requirements. Next you should make sure you restart ComfyUI service and then Refresh your Browser. This is crucial step each time you should do each time something new is installed.
Run Workflows
I then downloaded the workflows available from the author’s side and load them up on ComfyUI to start experimentation. In the video below the author shares more details on the features and different workflows.
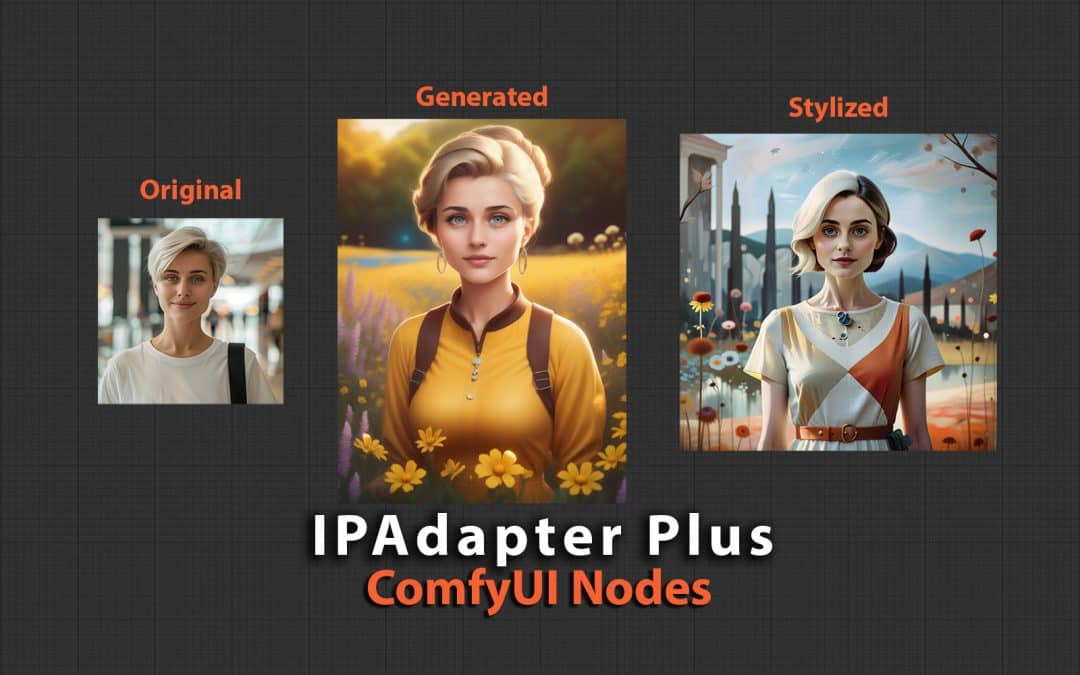
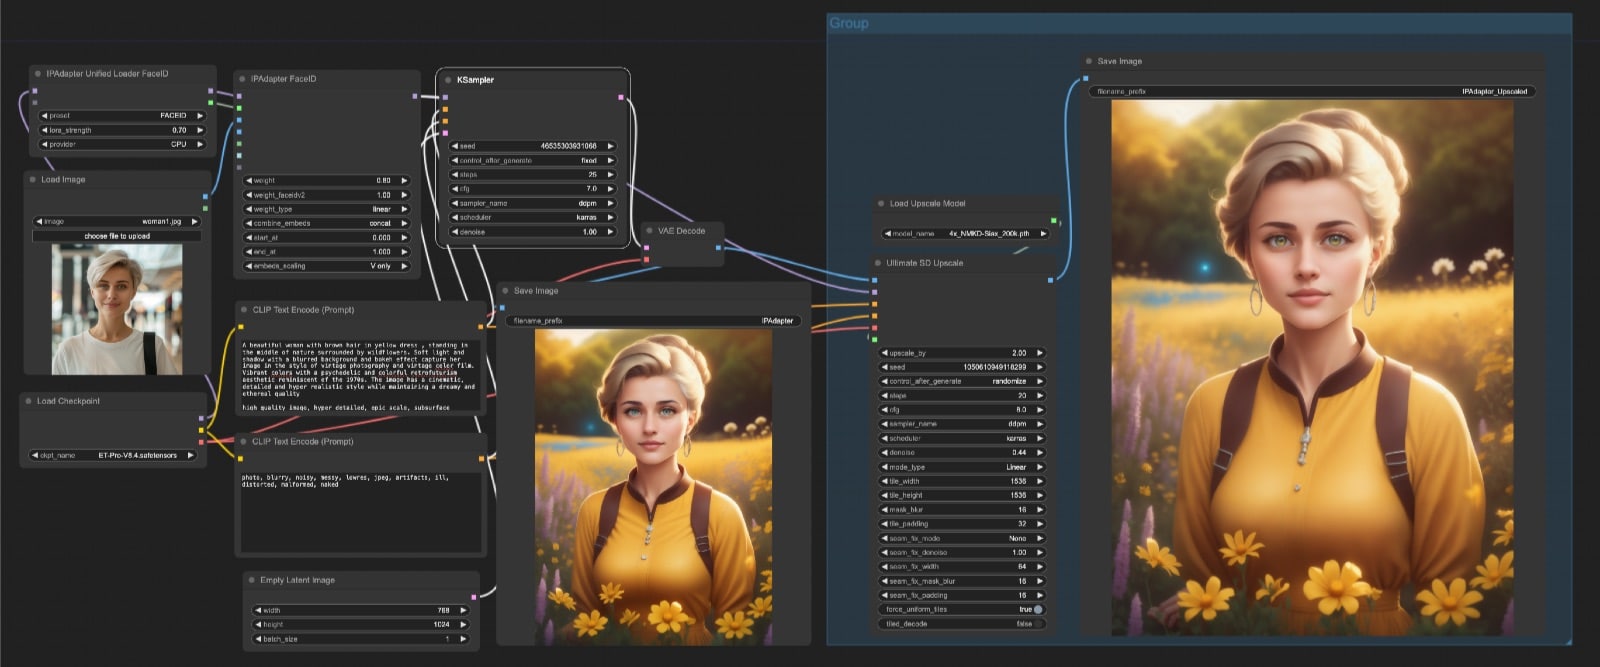
I started experimenting with different workflows and creates a few of my own variations. First one is using IPAdapters and upscaling them using Ultimate SD Upscaler, the result is that the face is consistently applied to the resulting image that is upscaled and all this is happening without use of any ControNet.
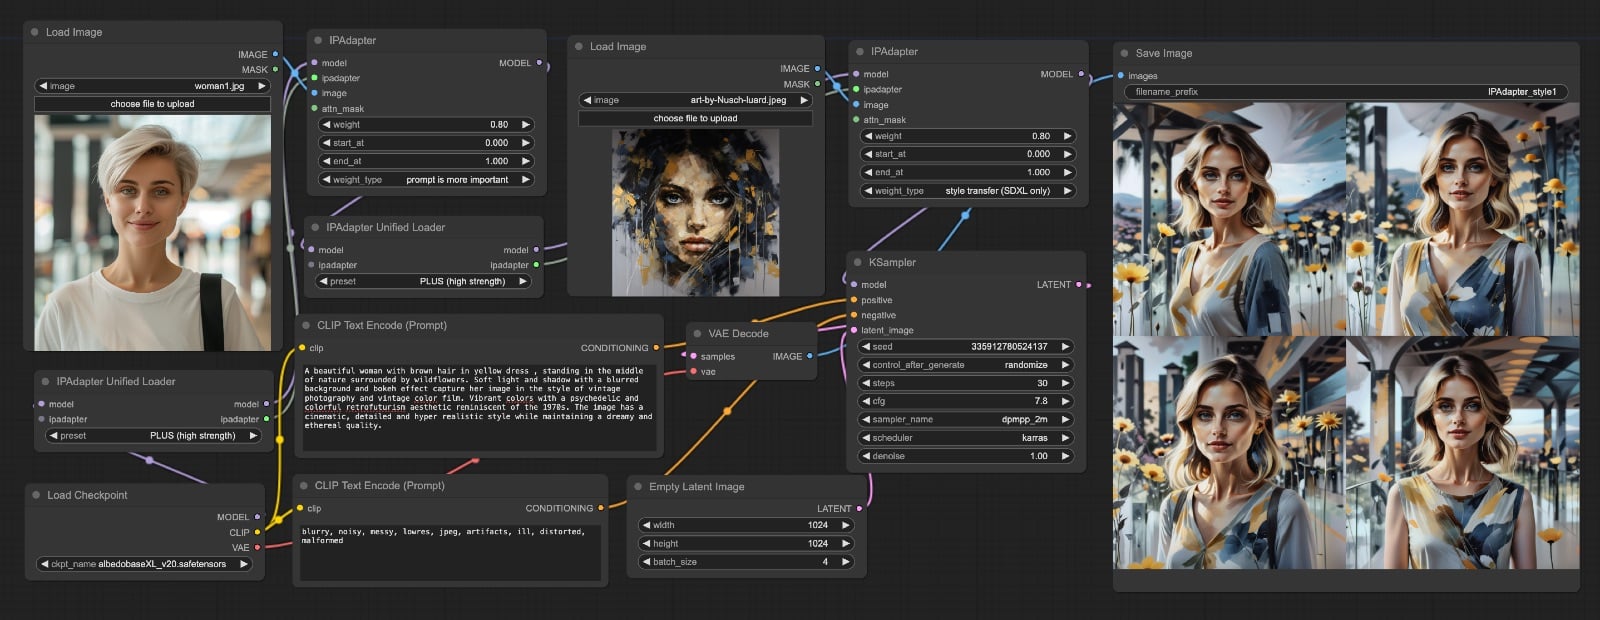
Next scenario I try Style Transfter which is hidden away in the IPAdapter node under weight type. First image is the face reference and the 2nd image is the style reference. I found the resulting image does take on the colour aesthetics of the style reference but doesn’t mimic the medium or other details. I think maybe that I have not figured out the optimum settings.
You can download all these resources via the link below and try them out yourself. The Jupyter notebook is also included in the download.
IPAdapter Workflow & Notebook (713 downloads )Conclusion
IPAdapter Plus certainly appears to be a great addition to ComfyUI workflow and I’m glad I started experimenting with these custom nodes and workflows. I will continue exploring this further as I get familiar with the different nodes. The video is a great way to learn the different workflows and of course watching is not only it, you need to install and setup IPAdapter Plus to try out the different settings and combinations.
If you'd like to support our site please consider buying us a Ko-fi, grab a product or subscribe. Need a faster GPU, get access to fastest GPUs for less than $1 per hour with RunPod.io