
Many people have been looking at alternatives to Google Colab and one great solution is Paperspace. You can create multiple notebooks and run up machines using GPUs that are available for free or charged by the hour. In this post I want to share my workflow of how I run up Stable Diffusion on Paperspace. This notebook can run multiple versions of Stable Diffusion using Automatic1111.
I am assuming that as a reader you have basic code understanding and have had some experience with Google Colab.
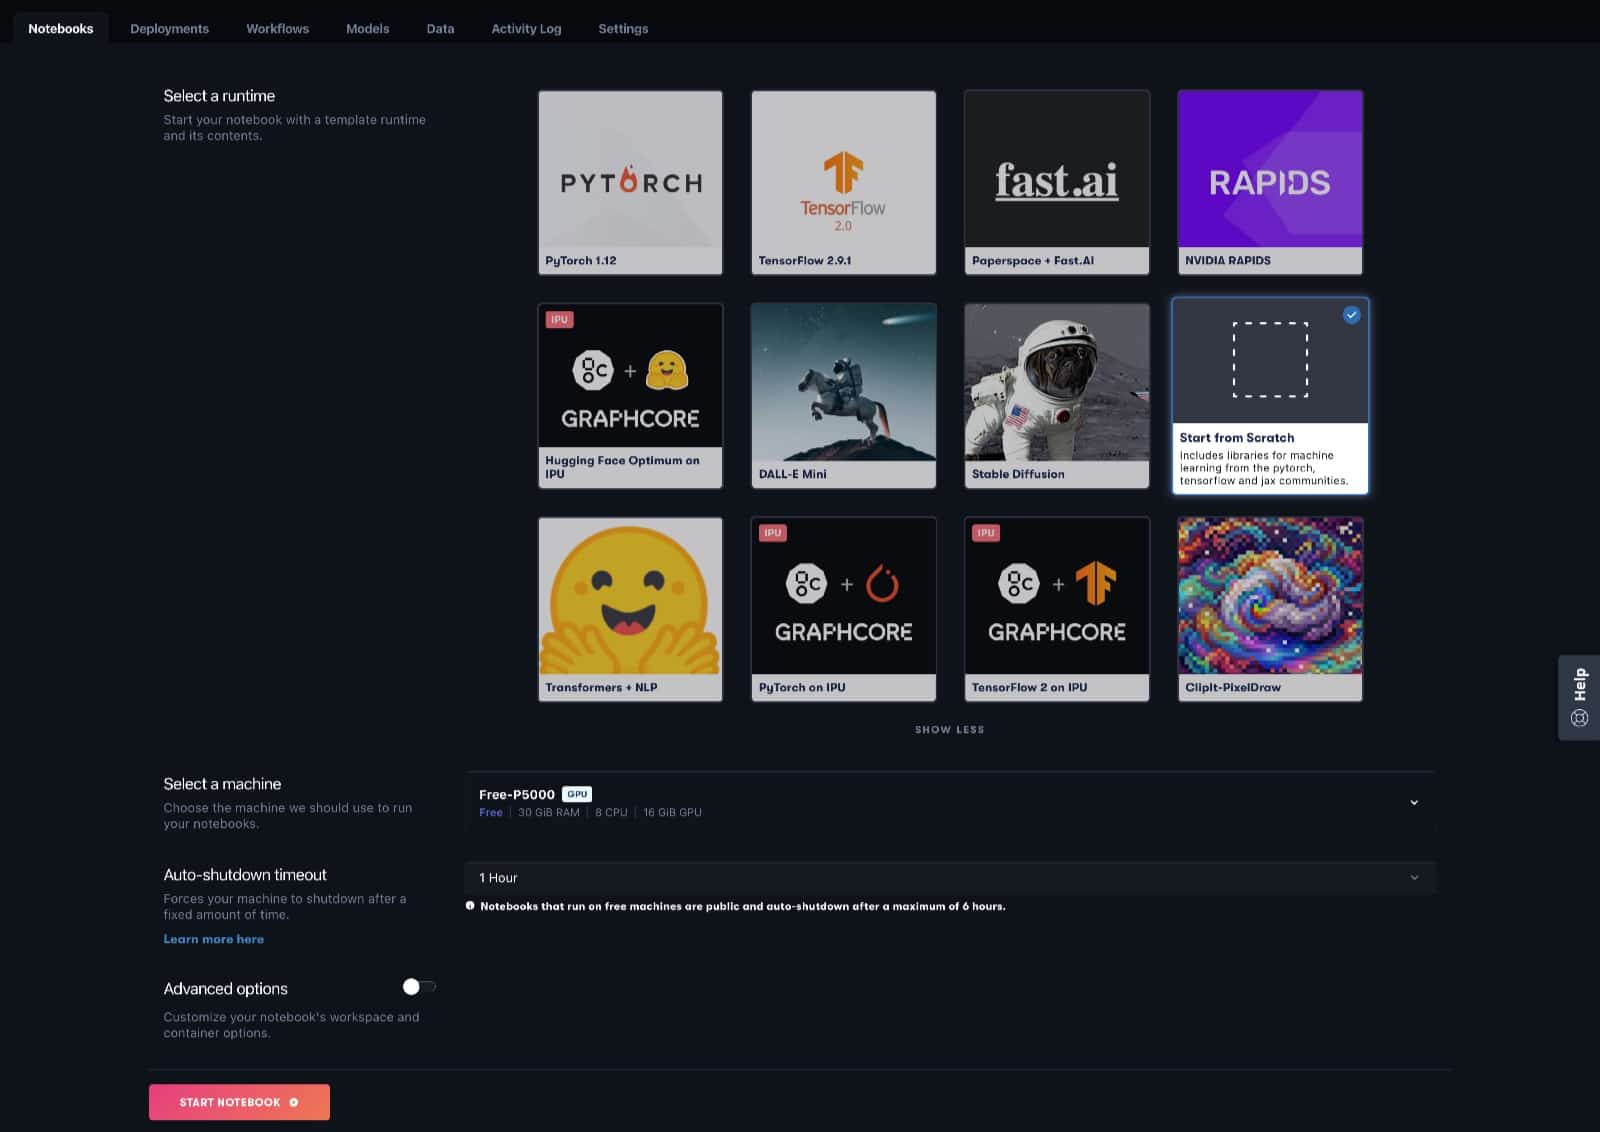
Start of the Interface and in the notebooks create a new notebook. Select the option Start from Scratch, choose the desired GPU and Auto-shutdown timeout choose the maximum of 6 hours.
Start notebook when you are ready…we need the notebook running for the next steps.
Head over the GitHub and download the StableDiffusionUI_Voldemort_paperspace.IPYNB file created by Engineer of Stuff and is available for download for free. Link: https://github.com/Engineer-of-Stuff/stable-diffusion-paperspace
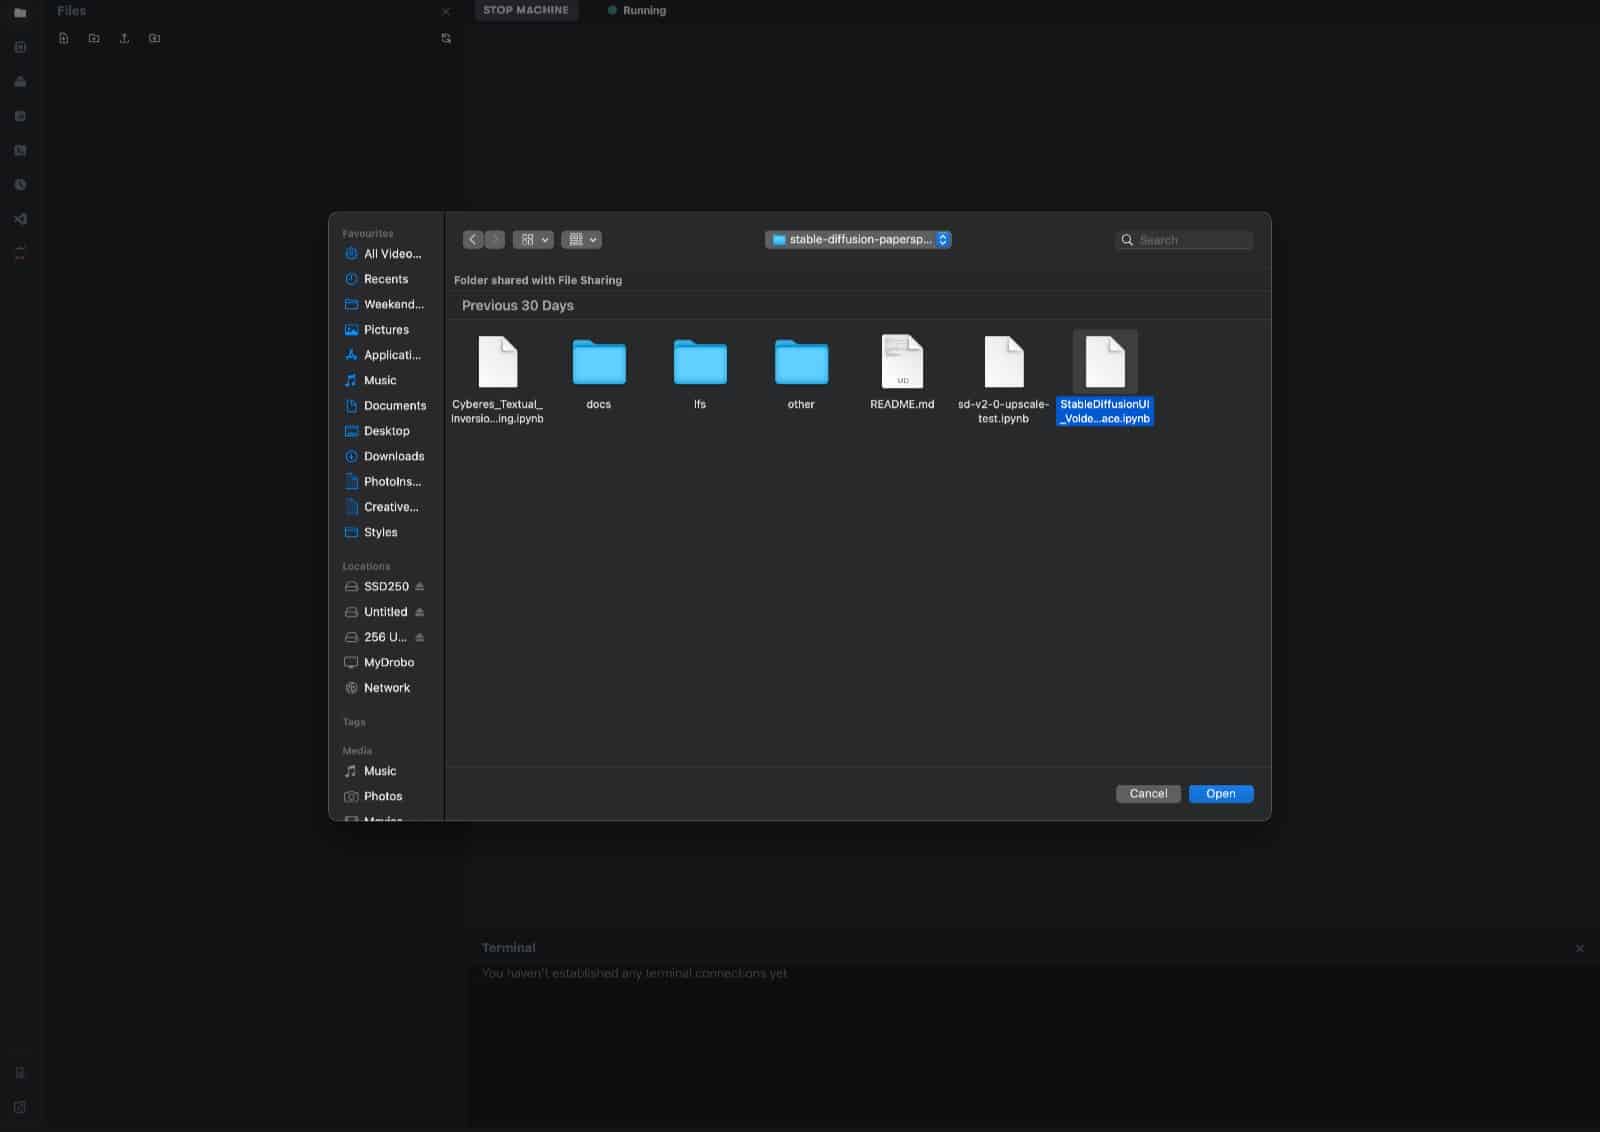
In the meantime your Notebook would have started and on the left side should be folder 📁 button which will show a file manager. Upload the file ‘StableDiffusionUI_Voldemort_paperspace.IPYNB‘ you just download to the Notebook. It should only take 2-3 seconds to upload the file.
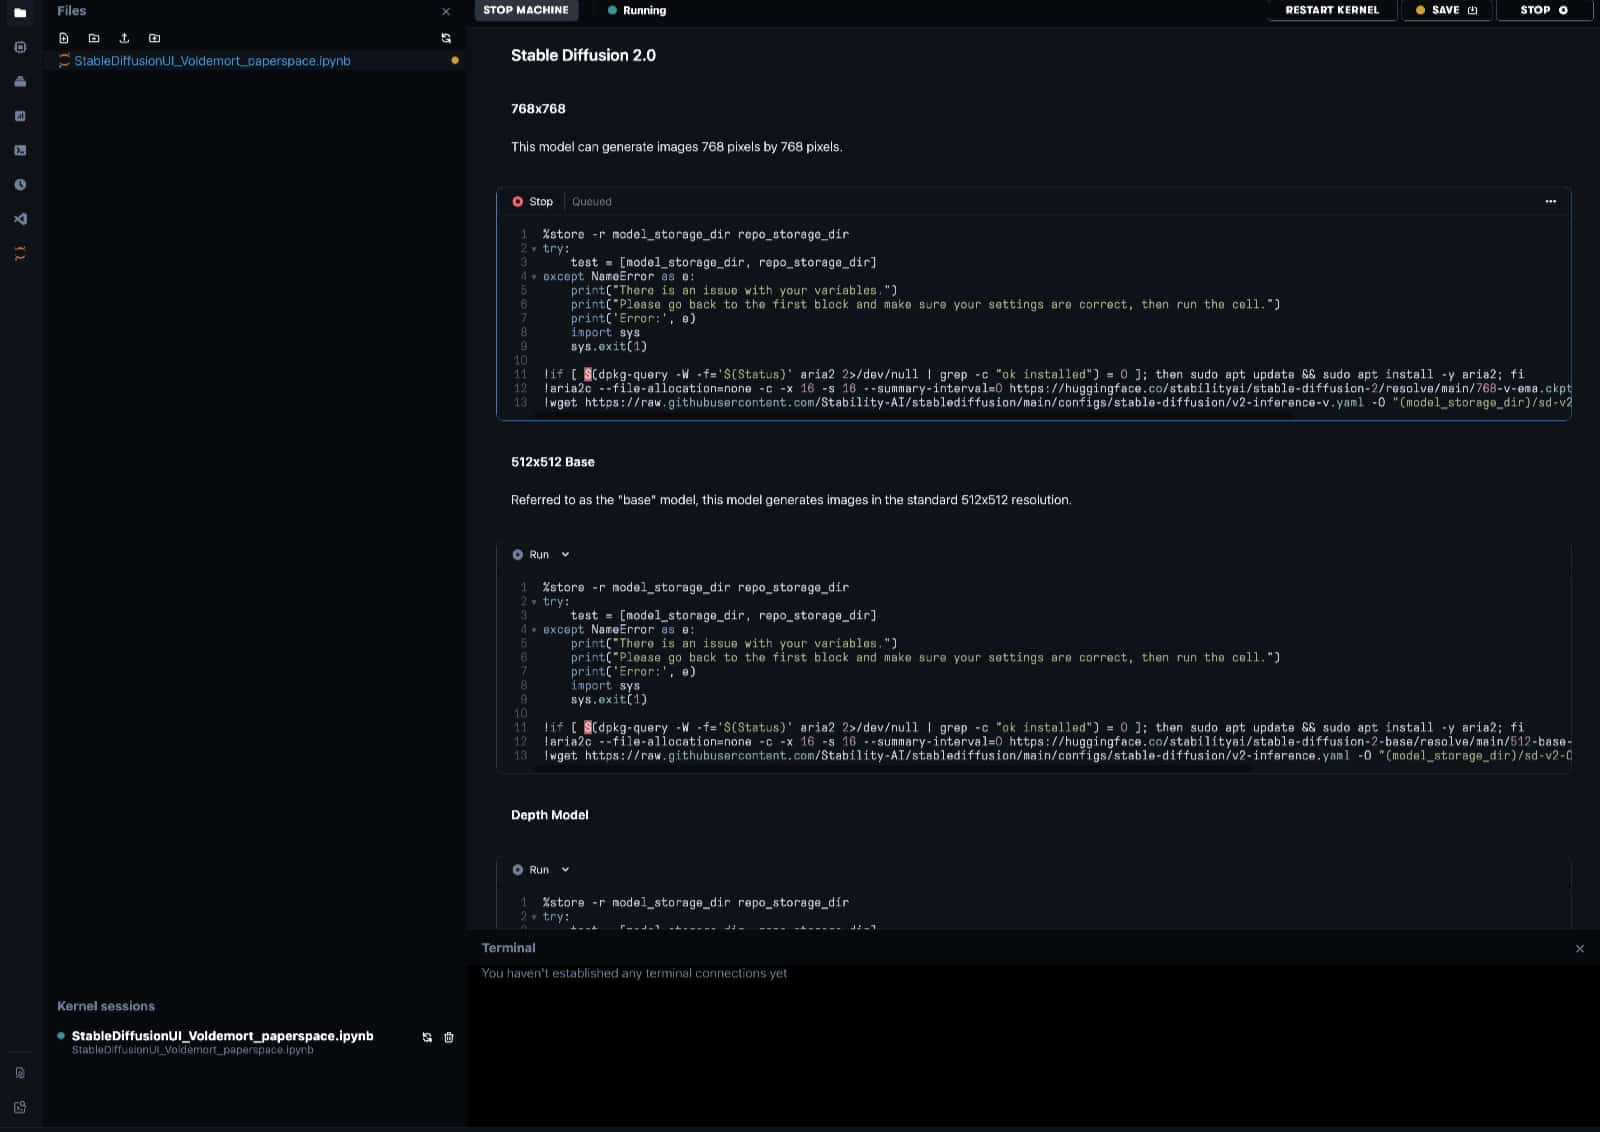
Double click the file and you should see that the Notebook starts with a Kernel Session. This should be visible in the bottom left section of the site (as seen below). Now just like in Google Colab, in Paperspace Notebook you have different code cells that you need to run in order to get your Stable Diffusion 2 instance up and running.
The first cell is about setup of your notebook and the key area to focus on is the Free vs Paid tier. Uncomment (remove the # from start of the line) based on the section that applies to you looking at only the first 8 lines of code.
In my case I am using the Paid Tier and I like to store my model location in tmp folder, the repo location remains as per default. So I only modify “model_storage_dir” to “/tmp/models‘.
Run/Re-Run the Notebook Code
Run the cell when done updating, by clicking on the Run button on the top left of the cell.
# Free tier
# symlink_to_notebooks = True           # Enables the creation of symlinks back to /notebooks/
# model_storage_dir = '/tmp/stable-diffusion/models'   # Where the models will be downloaded to.
# repo_storage_dir = '/notebooks'       # Where the repository will be downloaded to.

# Paid Tier
symlink_to_notebooks = False
model_storage_dir = '/tmp/models'
repo_storage_dir = '/notebooks'
Next step is to run the Clone the WebUI repository. This will download the WebUI repo from the web, this ensures that your version remains up to date always after the first time you run it.
Following this Run the Install requirements and download repositories, which installs all the required files to make the whole thing work.

Now that all the files are installed, we need the Stable Diffusion 2.0 model downloaded. You have numerous options available here to download the 768×768 pixel version or the 512×512 pixel version. You can download one or more model versions which can then be selected later on in the Automatic1111 WebUI.
Run the corresponding cell related to your model. I’m running 768×768 cell to download and install this model.
Next step is to run the cell below Link the models directories. This checks all the available models and links them up for use in the WebUI.

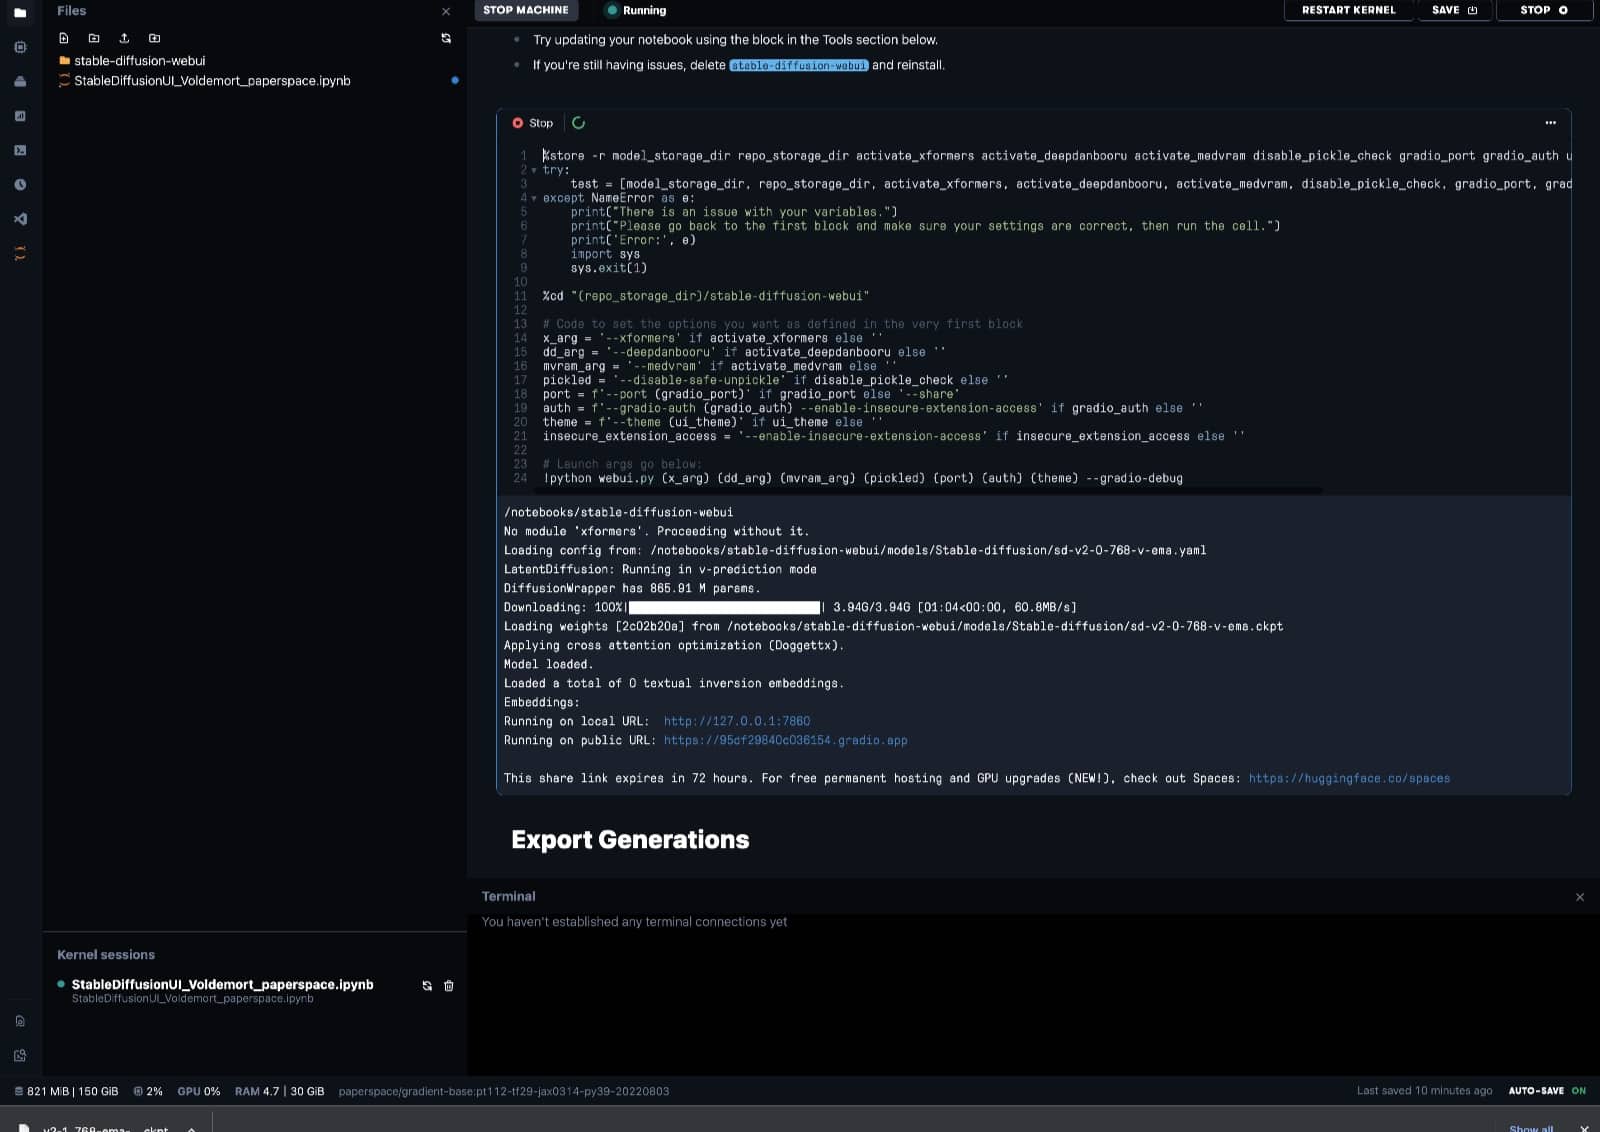
Finally we are now ready to run the main cell that will give us access to run the prompts we want and create images. Navigate down to Launch the WebUI section and run the cell within.

As the code runs it will produce two URLs that will show up at the end of the execution summary which is displayed below the cell. If you don’t see it there should be a More button that reveal the rest of the summary. It should look like this:
Running on local URL:  http://127.0.0.1:7860
Running on public URL: https://cd8ba7da-e506-47e7.gradio.live
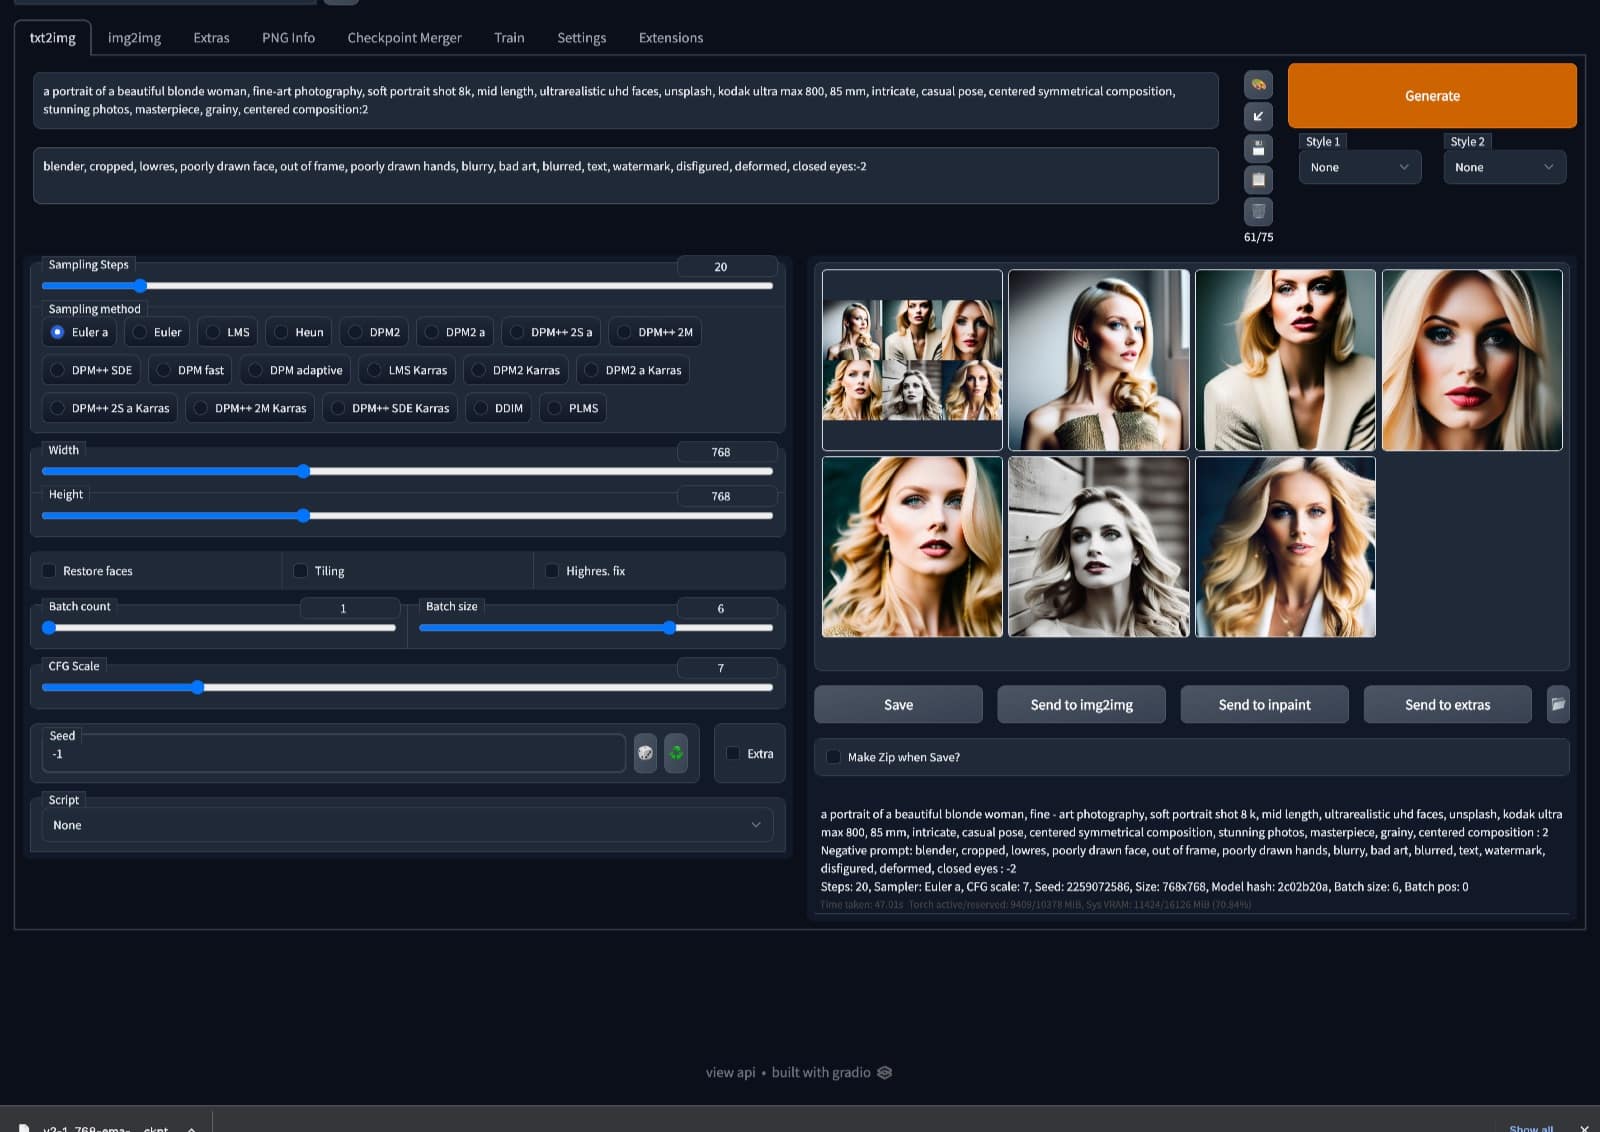
Now the fun part starts up as a new tab opens with the Automatic1111 WebUI interface running Stable Diffusion 2.0. I use the prompt provided on the Stable Diffusion website.
Enter both the prompt and the negative prompt (as shown below).
Prompt: a portrait of a beautiful blonde woman, fine – art photography, soft portrait shot 8 k, mid length, ultrarealistic uhd faces, unsplash, kodak ultra max 800, 85 mm, intricate, casual pose, centered symmetrical composition, stunning photos, masterpiece, grainy, centered composition:2
Negative Prompt: blender, cropped, lowres, poorly drawn face, out of frame, poorly drawn hands, blurry, bad art, blurred, text, watermark, disfigured, deformed, closed eyes:-2
Sampling Steps: 20
Sampling method: Euler a
Width and Height: 768
Batch size: 6 (but you can set to what you want).
Click on Generate to start generation of your image.
Now that you have Stable Diffusion 2.0 running in Paperspace using Automatic1111, you can repeat the above steps each time from Run/Re-Run the Notebook Code section onwards. You don’t need to create a new notebook each time as it will stay saved as long as you maintain your account in Paperspace or decide to delete it yourself.
When done creating the images you can switch back to the browser tab where you were running the Notebook, stop the cell in Launch the WebUI which should be running still. Once it stops, use the Export Generations cell and run it to create a ZIP file of the images generated. This is obviously faster than downloading each image from the outputs directory which should be visible in the file browser.
Sample Images
Here are some of sample images I created using above and other prompts.


I hope you find this post useful, I am also wanting to do a video tutorial demonstrating this setup so you can follow along and see it action but this will have to wait a bit. In the meantime, let me know in the comments below if you have any questions.
If you'd like to support our site please consider buying us a Ko-fi, grab a product or subscribe. Need a faster GPU, get access to fastest GPUs for less than $1 per hour with RunPod.io
The gradio.live website cannot be opened. I have built the WEBUI, but the WEBUI address before the target is generated cannot be accessed. What is the reason?
Sometimes the link is not clickable till you click on the MORE button below the output from the RUN command. I have had that happen to me..but after I click on MORE which reveals remaining output lines I have been able to click the Public Link.